Irresistible Mini Christmas Drip Cakes
Why Make This Recipe
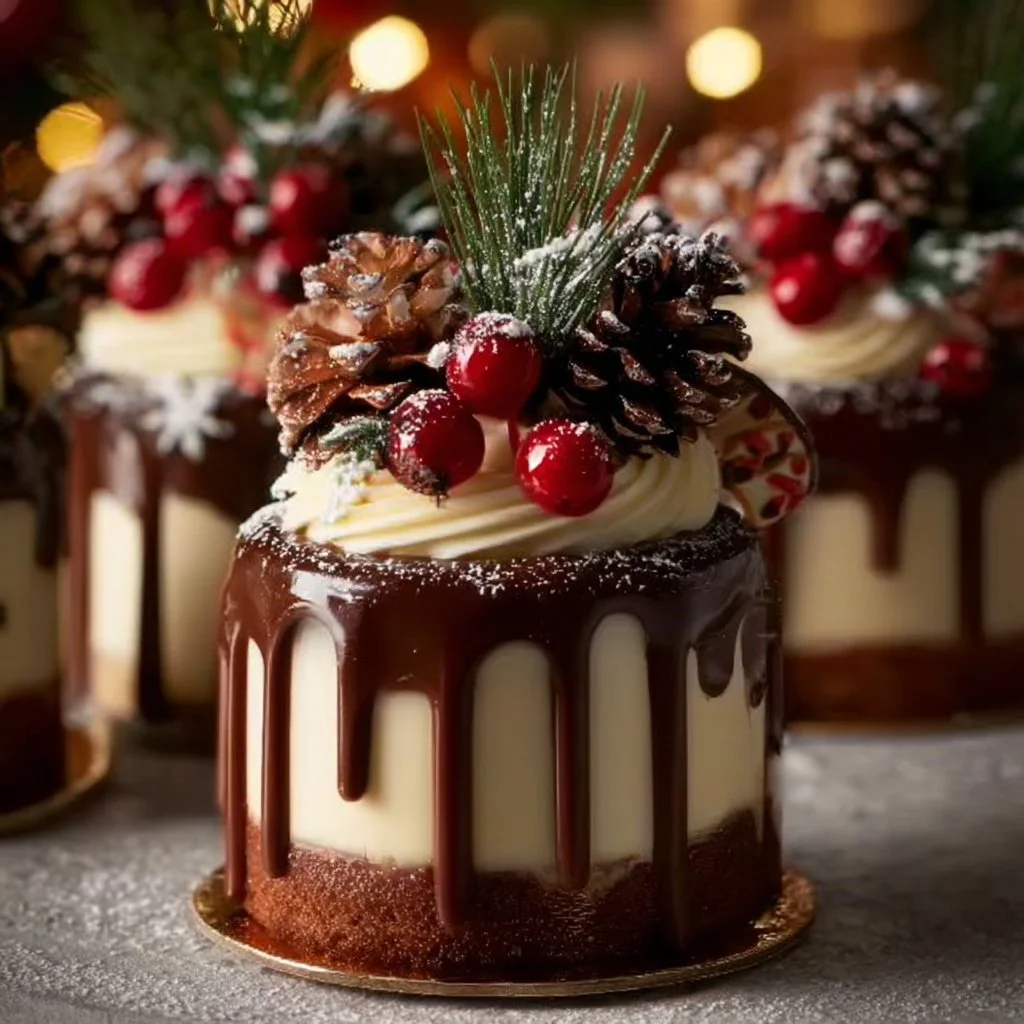
Christmas is a time of joy, celebration, and of course, delicious treats! Among the numerous festive delights that grace our tables, mini Christmas drip cakes stand out as both charming and tantalizing. They not only capture the essence of the holiday season but also bring a sense of elegance to any gathering. What makes these little cakes irresistible? It’s their delightful combination of soft, moist sponge and rich, luscious chocolate ganache that creates a perfect balance between sweetness and texture.
Mini Christmas drip cakes are perfect for parties, gifts, or just as a treat for yourself and your loved ones. Their small size makes them easy to serve and eat, while also allowing you to experiment with flavors and decorations. Imagine a table filled with these adorable cakes, each topped with colorful sprinkles or festive decorations, beckoning guests to indulge.
Plus, the aroma of freshly baked cakes wafting through your home is bound to elevate the holiday spirit. They’re easy to make, even if you’re a beginner, and they give you a great opportunity to involve friends or family in the kitchen. Cooking together can be a fun bonding experience, creating lasting memories over delicious food.
How to Make Irresistible Mini Christmas Drip Cakes
Making mini Christmas drip cakes is a fun and straightforward process. Follow the steps below, and you’ll have delicious cakes ready to impress your guests in no time!
Ingredients
- 1 cup Butter (softened)
- 1 cup Sugar
- 2 large Eggs (room temperature)
- 2 teaspoons Vanilla Extract (or almond extract)
- 1.5 cups All-Purpose Flour (or gluten-free flour blend)
- 1.5 teaspoons Baking Powder (ensure it’s fresh)
- 0.5 teaspoon Salt
- 0.5 cup Milk (or almond/oat milk)
- 1 cup Heavy Cream (or coconut cream)
- 2 tablespoons Powdered Sugar (no substitutions)
- 6 ounces Dark Chocolate (or milk chocolate)
Directions
-
Preheat the Oven: Start by preheating your oven to 350°F (175°C). This ensures that the cakes bake evenly and thoroughly.
-
Prepare the Cake Tin: Grease and flour a small cake tin, or you can line it with parchment paper for easier removal. This step prevents your cakes from sticking and makes for a cleaner presentation.
-
Cream Together Butter and Sugar: In a large bowl, take your softened butter and sugar, and cream them together until the mixture is light and fluffy. This can take about 3-5 minutes using an electric mixer on medium speed.
-
Add Eggs and Vanilla: Once your butter and sugar mixture is fluffy, add the room-temperature eggs and vanilla extract. Mix well until everything is combined smoothly.
-
Mix the Dry Ingredients: In another bowl, combine your all-purpose flour, baking powder, and salt. Whisk them together to ensure that the baking powder is evenly distributed throughout the flour.
-
Combine Dry and Wet Ingredients: Gradually add the dry ingredients to the butter mixture, alternating with the milk. Start with the flour mixture, then add half of the milk, then more flour, and continue alternating until everything is well mixed. The batter should be smooth and slightly thick.
-
Divide the Batter: Pour the batter evenly into your prepared cake tin. This recipe should yield about 4 mini cakes or one larger cake, depending on your choice of tins.
-
Bake: Place the tin in the preheated oven and bake for 20-25 minutes. To check if they are done, insert a toothpick in the center of the cakes; if it comes out clean, the cakes are ready.
-
Cool the Cakes: Once baked, remove the cakes from the oven and let them cool in the tin for about 10 minutes, then transfer them to a wire rack to cool completely. This step is crucial to avoid melting the ganache later.
-
Prepare the Ganache: While your cakes are cooling, chop the dark chocolate into small pieces and place it in a bowl. In a saucepan, heat the heavy cream until it simmers, making sure not to boil it. Pour the hot cream over the chopped chocolate and let it sit for a couple of minutes. Afterward, stir gently with a spatula until the mixture is smooth and glossy.
-
Assemble the Cakes: Once the cakes are completely cooled, it’s time to assemble! If you have made multiple layers, stack them on top of each other. Drizzle the smooth chocolate ganache generously over the top and let it drip down the sides. You can use a spoon for this, or pour it into a squeeze bottle for more precise drizzling.
-
Decorate: Feel free to decorate the cakes according to your festive spirit! Use sprinkles, edible glitter, holly leaves, or even candy canes for that perfect Christmas touch.
-
Serve: Once decorated, your mini Christmas drip cakes are ready to serve! Place them on a beautiful platter and watch as your guests marvel at your creation.
How to Serve Irresistible Mini Christmas Drip Cakes
Serving mini Christmas drip cakes can be just as fun as making them! To make the presentation more festive, consider the following tips:
-
Festive Platter: Use a vibrant or themed platter that reflects the holiday spirit. Red, green, or even gold can add a stunning touch.
-
Serve with Whipped Cream or Ice Cream: Place a dollop of whipped cream or a scoop of vanilla ice cream next to each cake for an added indulgence.
-
Beverage Pairing: Consider serving these delightful cakes with a warm cup of cocoa, spiced cider, or a festive holiday punch.
-
Create a Dessert Table: If you’re hosting a gathering, set up a dessert table with your mini cakes alongside other holiday treats. This creates a beautiful spread and encourages guests to sample everything!
How to Store Irresistible Mini Christmas Drip Cakes
Storing your mini Christmas drip cakes properly will ensure they stay fresh and delicious even after a few days. Here’s how to do it:
-
Room Temperature: If you plan to enjoy the cakes within a day or two, you can keep them at room temperature. Place them on a covered cake stand or in an airtight container.
-
Refrigeration: For longer storage, especially if your cakes are decorated, it’s best to keep them in the refrigerator. Place the cakes in an airtight container to prevent them from absorbing any odors from the fridge and to keep the ganache intact.
-
Freezing: If you want to make them in advance, you can freeze the naked mini cakes (without ganache or decorations). Wrap each cake tightly in plastic wrap and then in aluminum foil. When you’re ready to enjoy them, simply thaw them in the refrigerator overnight and then apply the ganache and decorations before serving.
Tips to Make Irresistible Mini Christmas Drip Cakes
-
Use Room Temperature Ingredients: Make sure your eggs, butter, and milk are at room temperature before starting. This helps the batter mix evenly.
-
Measure Accurately: Baking is a science, so ensure you measure your ingredients accurately for the best results. Use a kitchen scale for precision if possible.
-
Experiment with Flavors: Don’t hesitate to add a twist! You can try different extracts like peppermint or orange zest for an added festive flavor.
-
Ganache Consistency: If your ganache is too thick when you’re ready to use it, gently reheat it in the microwave (in short bursts) or over a double boiler until it reaches the desired pouring consistency.
-
Decoration Variety: Get creative with decorations! Use seasonal fruits, nuts, or even chocolate shavings to customize each cake.
Variation (If Any)
There are several ways you can customize your mini Christmas drip cakes:
-
Flavor Variations: Instead of chocolate, you can use different flavored ganache. For instance, a white chocolate ganache can add a beautiful contrast. You can also add flavored extracts like peppermint or almond into the cake batter or ganache for new flavors.
-
Filling Options: For an added surprise, you could fill them with jam, frosting, or even flavored whipped cream between layers.
-
Topping Adjustments: Instead of traditional chocolate sprinkles, consider using crushed candies, coconut flakes, or even chocolate chips for a different texture on top.
FAQs
How long do mini Christmas drip cakes last?
If stored properly in an airtight container at room temperature, they can last for about 2-3 days. If refrigerated, they will stay fresh for up to a week. If you freeze them, they can last for about 1-2 months.
Can I use gluten-free flour?
Absolutely! You can substitute all-purpose flour with a gluten-free flour blend. Just ensure that your baking powder is gluten-free as well.
Is it possible to make these cakes dairy-free?
Yes! Use softened coconut oil instead of butter, and swap heavy cream for coconut cream. Also, replace milk with any non-dairy milk such as almond or oat milk for a delicious dairy-free version.
Can I make these cakes in advance?
Definitely! You can bake the cakes a day or two before your event. Store them in the refrigerator without decorations, and apply the ganache and adornments on the day of serving for the best presentation.
How can I make the ganache shiny?
To achieve that beautiful glossy finish, ensure your heavy cream is hot enough when you pour it over the chocolate. Stir gently until fully combined and smooth. Avoid over-stirring, as it can cause the ganache to lose its shine.
In conclusion, making Irresistible Mini Christmas Drip Cakes is not only a wonderful way to celebrate the holiday, but it also offers a delightful crafting opportunity that can bring joy and togetherness to your kitchen. With their charming appearance and rich flavor, these cakes are sure to make your festive gatherings even more special! Enjoy your baking and happy holidays!