No Bake Peanut Butter Pie
Why Make This Recipe
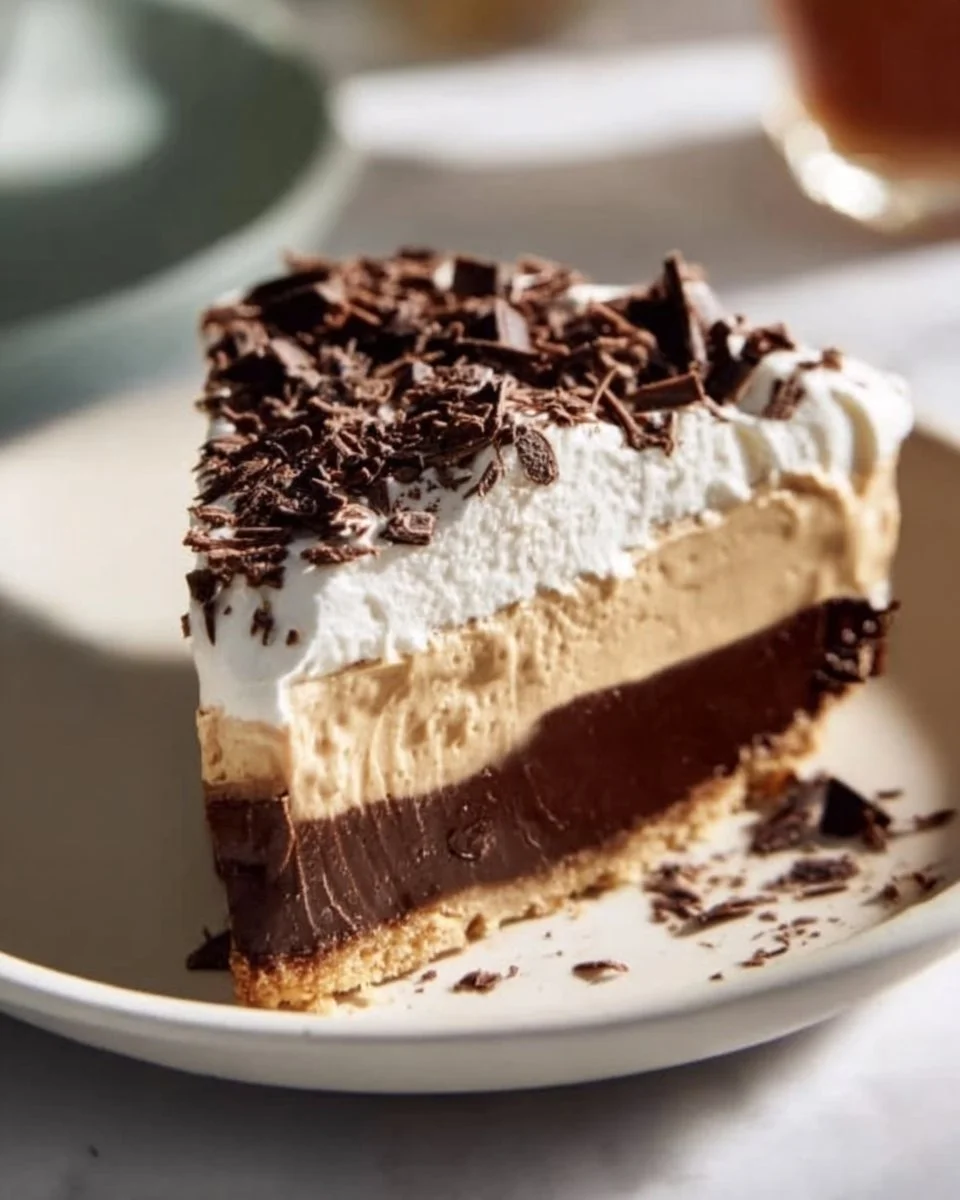
No Bake Peanut Butter Pie is a delightful dessert that combines the creamy taste of peanut butter with the sweetness of chocolate and the richness of an Oreo crust. It is a perfect dessert for any occasion, such as birthday parties, family gatherings, or just when you want to indulge yourself. What makes this dessert even more appealing is that it requires no baking, making it a simple and quick treat to whip up.
This pie is not only easy to prepare, but it also requires minimal ingredients that are usually pantry staples, so you can make it anytime. The balance of flavors—rich peanut butter, sweet cream cheese, and chocolate pudding—will please any sweet tooth. Plus, it appeals to both the young and the young at heart, making it a crowd-pleaser!
How to Make No Bake Peanut Butter Pie
Making No Bake Peanut Butter Pie consists of simple steps that even beginners can follow. You will enjoy layering each component, and the best part is that there’s no need for baking. Below, you will find a thorough breakdown of the entire process along with the necessary ingredients to help you prepare this decadent pie.
Ingredients
- 1 package Oreo cookies, regular or double stuffed
- ¾ stick butter, melted
- 16 oz. Cool Whip
- 8 oz. cream cheese, softened
- ½ cup peanut butter
- 1 cup powdered sugar
- 5.9 oz. instant chocolate pudding
- 3 cups milk (or as indicated on pudding package)
Directions
-
Prepare the Crust: Start by crushing the Oreo cookies into fine crumbs. You can do this using a food processor or by placing them in a plastic bag and using a rolling pin. Once the cookies are crushed, mix them with melted butter in a bowl. This will create your crust mixture. Next, press this mixture firmly into the bottom of a 9×13-inch pan to form an even layer for your crust.
-
Make the Peanut Butter Filling: In a mixing bowl, beat the softened cream cheese until it is smooth and creamy. Once you achieve that smooth consistency, add half of the Cool Whip to the bowl. Then, mix in the peanut butter and powdered sugar, continuing to beat the mixture until it becomes fluffy and well combined.
-
Spread Peanut Butter Mixture Over the Crust: Once your peanut butter filling is fluffy, pour it over the crust you previously prepared. Use a spatula to spread it evenly so every bite is filled with that smooth peanut butter flavor.
-
Prepare Chocolate Pudding: Follow the instructions on the pudding package to prepare it. Typically, you will need to whisk the pudding mix with milk until it thickens. Once your pudding is ready, carefully spread it over the peanut butter layer in your pan.
-
Top with Remaining Cool Whip: This step adds a lovely finishing touch! Spread the remaining Cool Whip over the layer of chocolate pudding. Make sure it covers the pudding completely. This will give a light, airy feel to each slice.
-
Chill in the Refrigerator: To let the pie set, cover the pan with plastic wrap and chill it in the refrigerator for at least two hours. This step is very important as it allows the flavors to meld together, and the filling will firm up, making it easier to slice later.
-
Optional Garnish: If you want to elevate the presentation, you can garnish with crushed Oreos or shaved chocolate before serving!
How to Serve No Bake Peanut Butter Pie
Serving No Bake Peanut Butter Pie is as simple as slicing it into squares or wedges. Use a sharp knife to cut clean pieces. You can serve the pie directly from the pan, or you can transfer individual slices to dessert plates for a more polished presentation.
When serving, consider pairing it with a dollop of whipped cream, a drizzle of chocolate syrup, or a sprinkle of crushed peanuts to enhance the presentation and texture. This pie balances richness and sweetness, so it pairs beautifully with a hot cup of coffee or a cold glass of milk. It’s a delightful treat that will impress your guests!
How to Store No Bake Peanut Butter Pie
To keep your No Bake Peanut Butter Pie fresh, store it in the refrigerator. Make sure to cover the pie securely with plastic wrap or place it in an airtight container to prevent it from absorbing any odors from the fridge. This dessert can typically stay fresh for about 3 to 5 days, but it’s best enjoyed within the first couple of days for optimal flavor and texture.
If you want to make this pie ahead of time for an event, just prepare it a day before, and it will be ready for you when you need it. Just remember to let it chill for at least two hours before serving so the layers can set properly.
Tips to Make No Bake Peanut Butter Pie
-
Use Room Temperature Ingredients: Make sure your cream cheese is softened at room temperature before you start mixing. This will help achieve a smooth filling without lumps.
-
Experiment with Peanut Butter: While traditional creamy peanut butter is great, feel free to try different types of peanut butter—creamy or chunky, even flavored ones such as honey or chocolate peanut butter can add unique flavors.
-
Check Your Oreo Cookies: If you prefer a less sweet crust, you can use regular Oreos instead of double-stuffed, or blend in some graham cracker crumbs for a mix.
-
Don’t Skip the Chilling Time: Allowing the pie to chill properly will enhance the flavor and texture. This step is key for a firm pie that holds its shape once sliced.
-
Be Gentle While Layering: When spreading the layers, especially the Cool Whip, do it gently to keep the layers distinct without mixing them.
Variation
While the classic No Bake Peanut Butter Pie is delicious on its own, there are variations you can try to mix things up:
-
Add a Chocolate Layer: For chocolate lovers, sandwiched layers of chocolate ganache between the crust and peanut butter filling could take it to the next level.
-
Use Different Cookies for the Crust: Instead of Oreos, consider using graham crackers, chocolate wafer cookies, or even gingersnap cookies to base your crust for varied flavor profiles.
-
Top with Other Ingredients: Beyond the regular garnishing options, you can add caramel drizzle, chopped peanuts, or even layer in banana slices for a delightful twist.
-
Fruity Toppings: Add slices of strawberries or raspberries on top of the Cool Whip. This adds a fruity flavor that complements the creaminess of the pie.
FAQs
1. Can I use heavy cream instead of Cool Whip?
Yes, you can use heavy cream instead of Cool Whip. Just whip heavy cream until stiff peaks form and incorporate it into the peanut butter filling. This will give you a fresher taste in the pie.
2. Can I freeze No Bake Peanut Butter Pie?
Yes, you can freeze No Bake Peanut Butter Pie. Just make sure to cover it well. When you are ready to serve it, allow it to thaw in the refrigerator for several hours before slicing.
3. Is this pie suitable for vegetarians?
Yes, this recipe is vegetarian-friendly as it does not contain any meat or meat by-products. However, always check the specific brands of the ingredients used to ensure they align with your dietary restrictions.
4. How can I make this pie dairy-free?
To make a dairy-free version, substitute the cream cheese and Cool Whip with dairy-free alternatives, and use non-dairy milk for the pudding. There are many brands that offer good substitutes.
5. How can I make this pie more chocolatey?
For a more chocolatey flavor, you can add chocolate chips to the peanut butter filling or use chocolate pudding instead of vanilla. Additionally, you can drizzle chocolate syrup over the top before serving.
6. How many servings does this recipe make?
This recipe usually yields around 12 to 16 servings, depending on how large you slice the pie. It is great for serving a crowd!
Now you have all the information and guidance to make your own No Bake Peanut Butter Pie! Whether you are preparing it for a special occasion or simply treating yourself, it’s a delightful recipe that brings joy to everyone who enjoys it. Happy baking (or shall we say, mixing) and enjoy your delicious creation!